Data sources from REST/json web services
Summary
The REST/JSON web services connector offers all the capabilities needed to connect to such sources. This option allows you to collect data from REST/JSON web services or configure writing actions, and then create data views and exhibit them in your API.
To connect to a web service, you must go to Data Origins > REST/JSON
Basic concepts
The REST (Representational state transfer) represents a definition of software architecture design which, when it meets all its specifications, is called RESTful.
The JSON term raises the application and response format that the service would deliver.
URL or endpoint
Any HTTP request requires a URI relating to a resource or entity. The most well-known form of URIs is URLs, which are composed of the following syntax:
On the basis of the detailed and example indicated, the complete URI of the service is:
Methods of requests or application
REST/JSON web services use the HTTP protocol to make transfers, so they make use of their request or request methods.
Application methods indicate the type of action to be taken on a particular resource. Thus, they can be thought of as verbs: consult, create, modify, delete, etc.
The most used methods in REST/JSON web service requests are as follows:
Headers of the application
Corps of application
Authentication and authorization schemes
Configure a REST/JSON service
Application methods indicate the type of action to be taken on a particular resource. Thus, they can be thought of as verbs: consult, create, modify, delete, etc.
The most used methods in REST/JSON web service requests are as follows:
Even these are the standard definitions, the web service may not conform to these specifications. That is why it must be taken as a reference and to know what type of application the web service expects.
Headers of the application
HTTP headers allow you to send additional information in the request and receive additional information in the response. The headers are composed of a name and value.
Corps of application
The body of the request (or body) is information that is sent to the origin upon consultation.
The body of the request has a direct relationship with the Content-Type header indicating the type of content that is sent in the request.
Authentication and authorization schemes
A REST/JSON web service may require some specific type of authentication and/or authorization, or none.
These can be classified into:
No authorization
Basic authorization (Basic Auth)
Bearer token
Configure a REST/JSON service
The basic concepts described above were intended to understand how it may be required to set up a REST/JSON service on the platform.
It would now explain how to set up such services in Workspace.
The configuration can be divided into the request to be made at the service and in the processing of its response.
Request

Method of application

Endpoint or URL


Authorization
You could define the type of content of the resolution, that is, Content-Type.


Request
In order to set up the request for web service you should consider the following aspects. Once the setup has been made, you should click on the Test button to make the request.
Method of application
You should indicate the method or type of application: GET, POST, PUT, PATCH or DELETE.
Endpoint or URL
You should enter the endpoint or URI.
If required, you could map endpoint segments and then set them as parameters of the method or relate them to context variables.
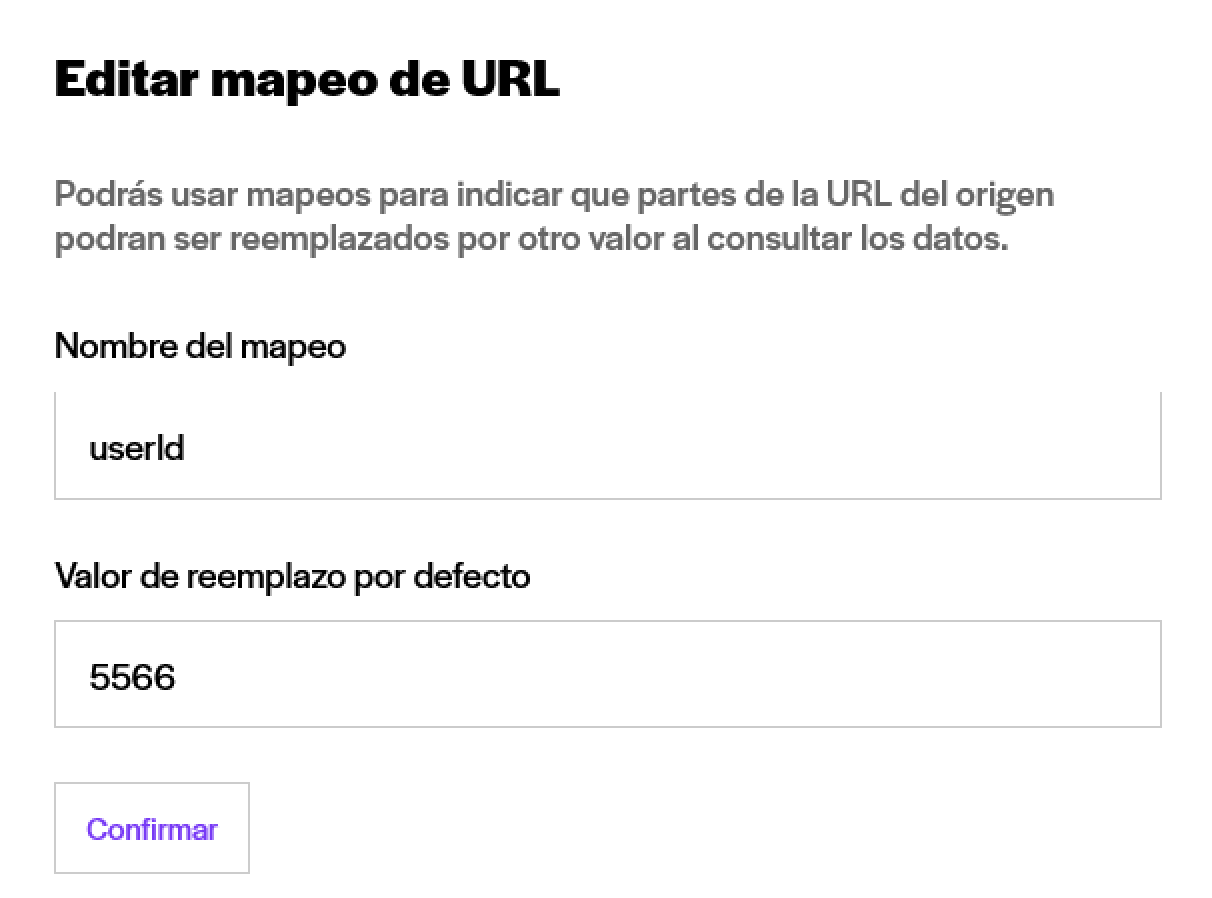
The functionality ofAdd mapping allows you to configure URL segments as parameters. For example, the route of our origin is https://api.vor-tex.io/accounts/v1/users/{{userId}}, where "{{userId}}" represents a variable that we must state as a matter of a method so that its value can be changed in the application.
You must click on the button Add mapping and enter a Mapping Name that would be the name of the parameter and a default value. Then click Confirm.
Available Maps would be displayed and in the URL of the Origin, you should add the name of the mapping between double keys in the appropriate position. In this case, {{userId}} is the name of mapping.
When creating the data view, it would display the "userId" parameter and could add the validations if applicable.

You can add multiple mapping on a source path.
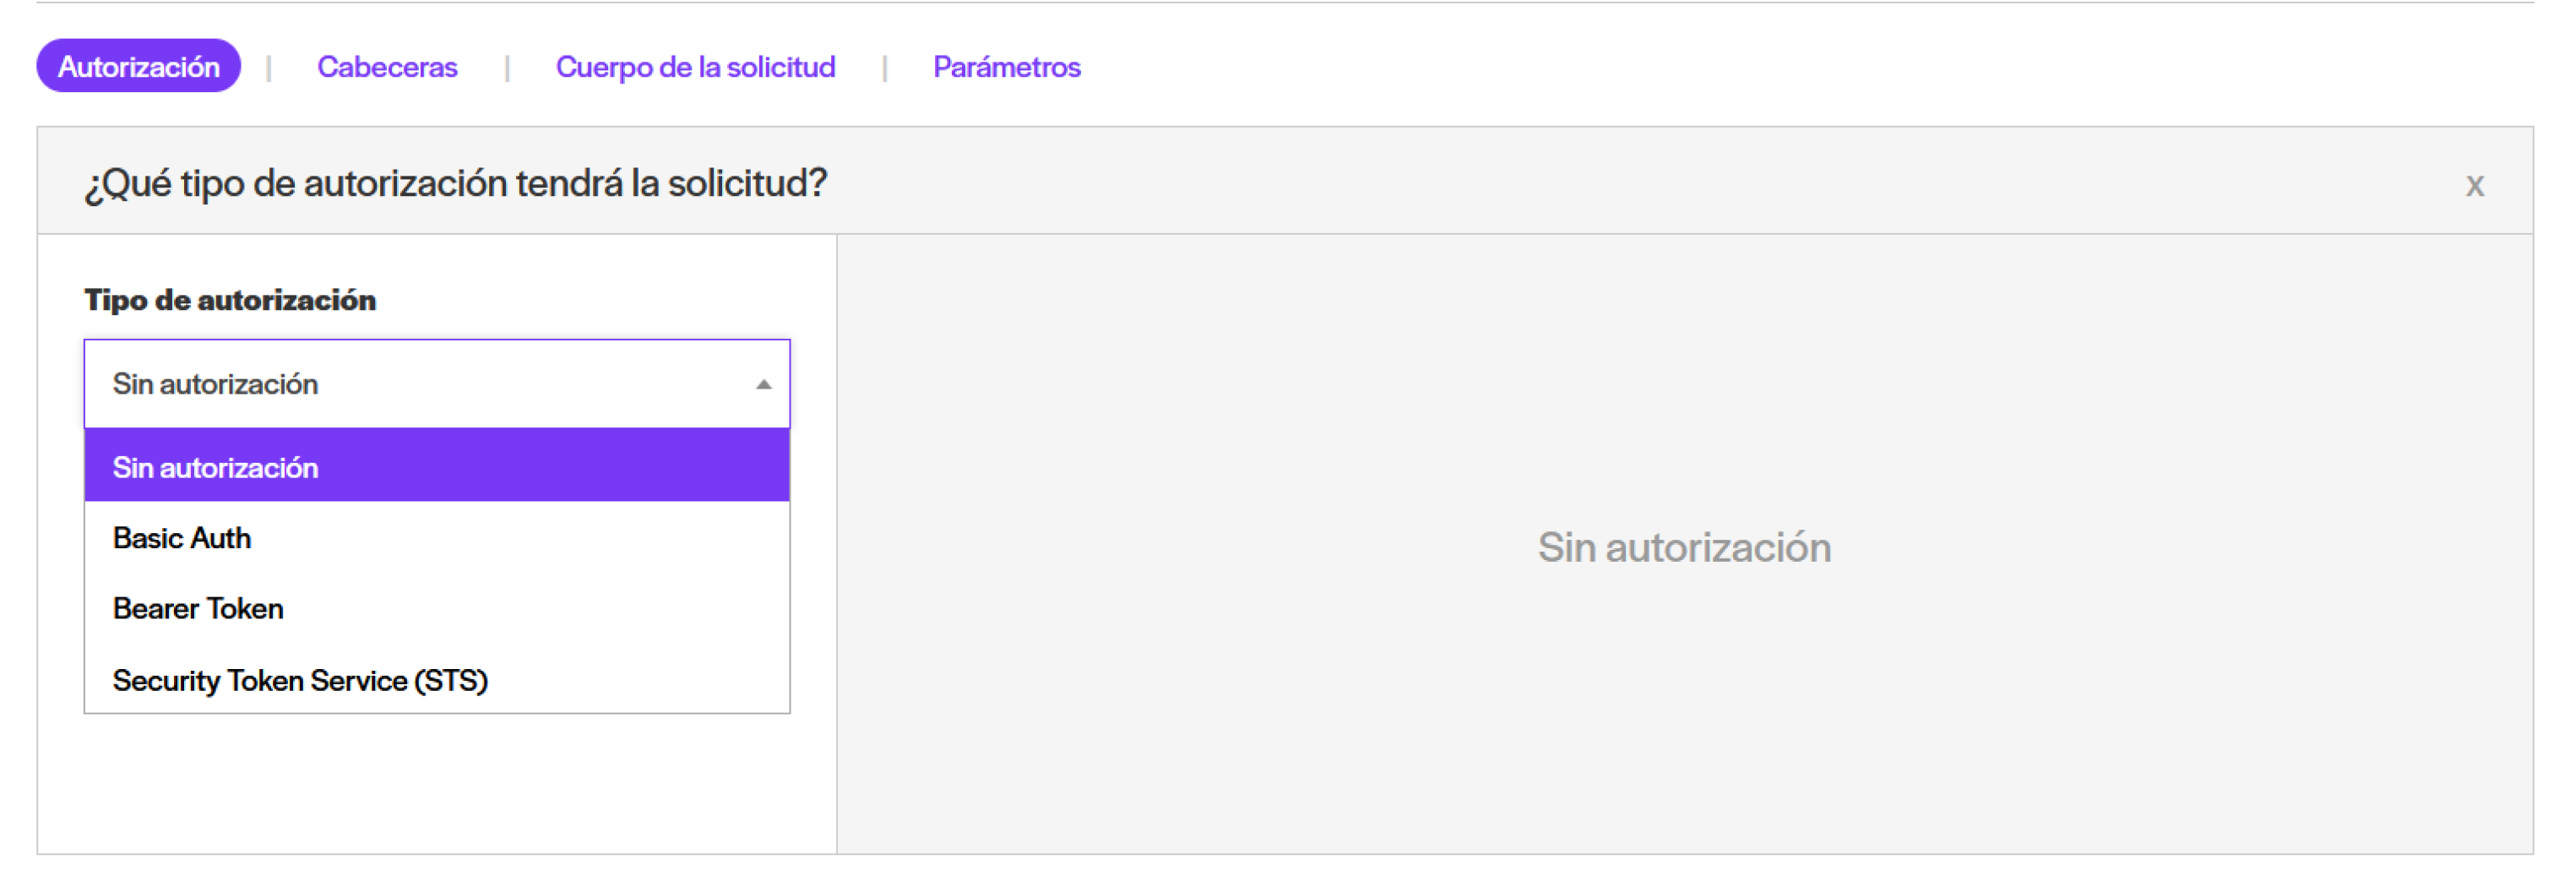
Authorization
If the service requires some type of authorization, you should configure it.
You can configure:
- Basic Authorization
- Bearer Token
- Security Token Service (STS)
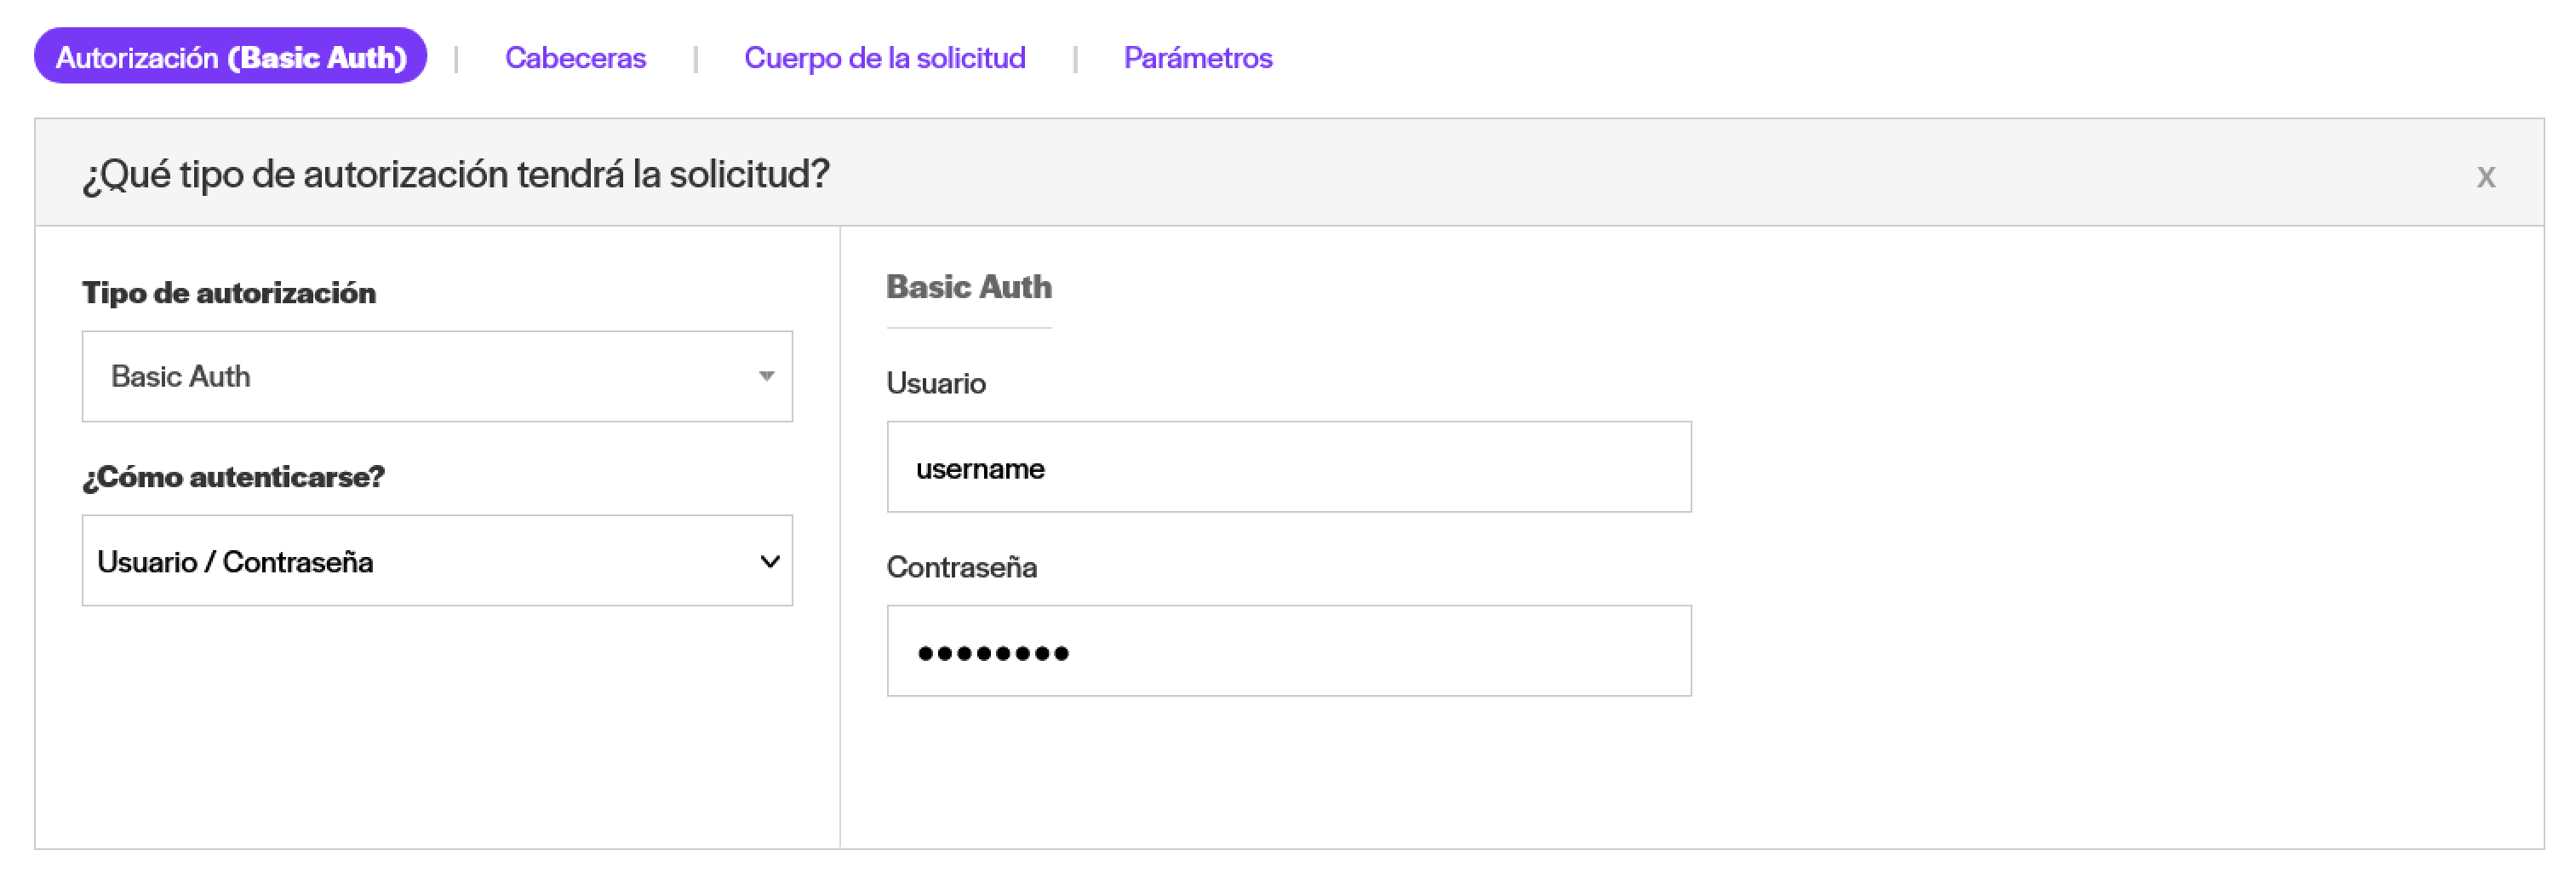
Basic Auth
Basic Auth meditating can be authenticated, where a user and password are used. The platform would generate the value of 'user: contradictory' encoded on a basis64 to send it properly in this type of authentication:Authorization: Basic Zm9vOmJhcg==
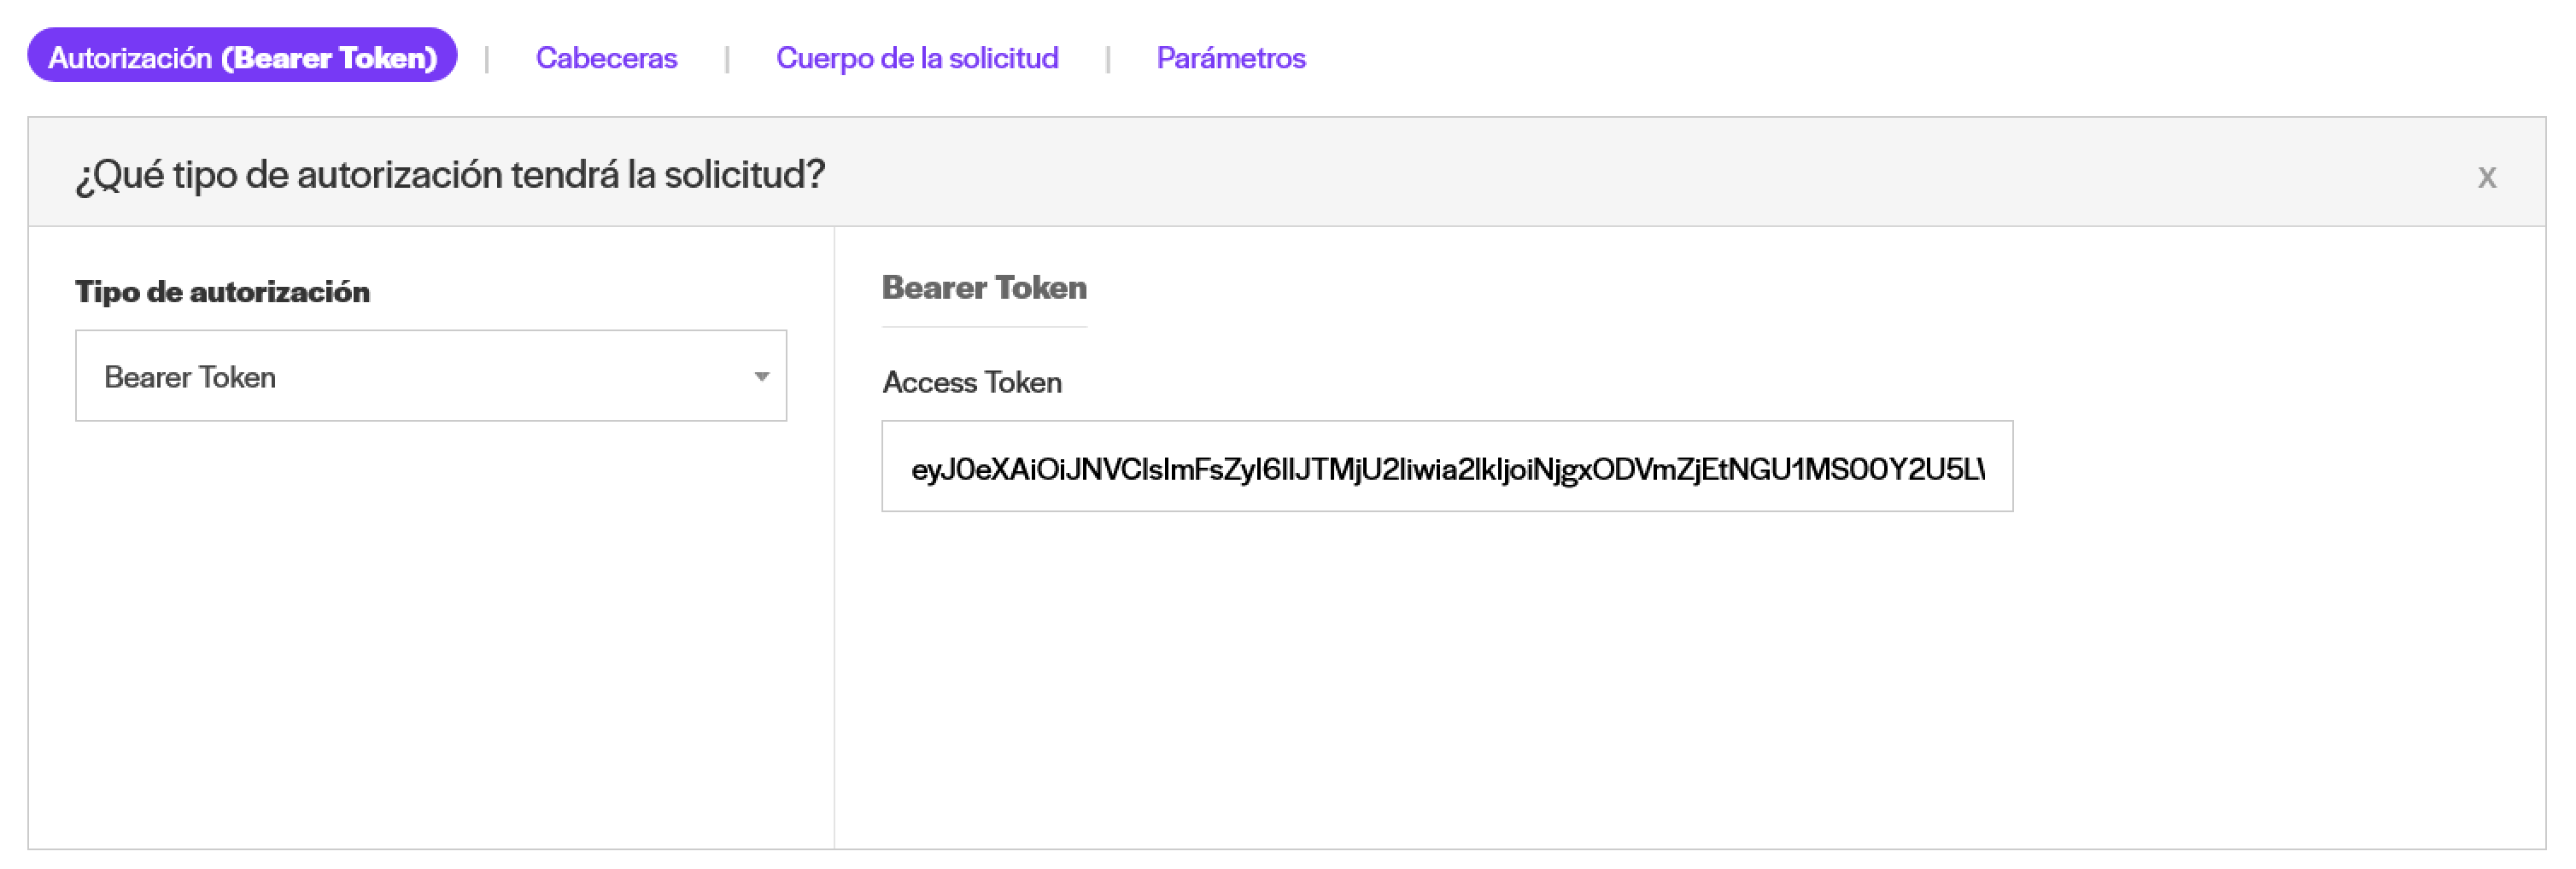
Bearer Token
If the service was protected by an access token with Bearer prefix you must use this option.
Security Token Service (STS)
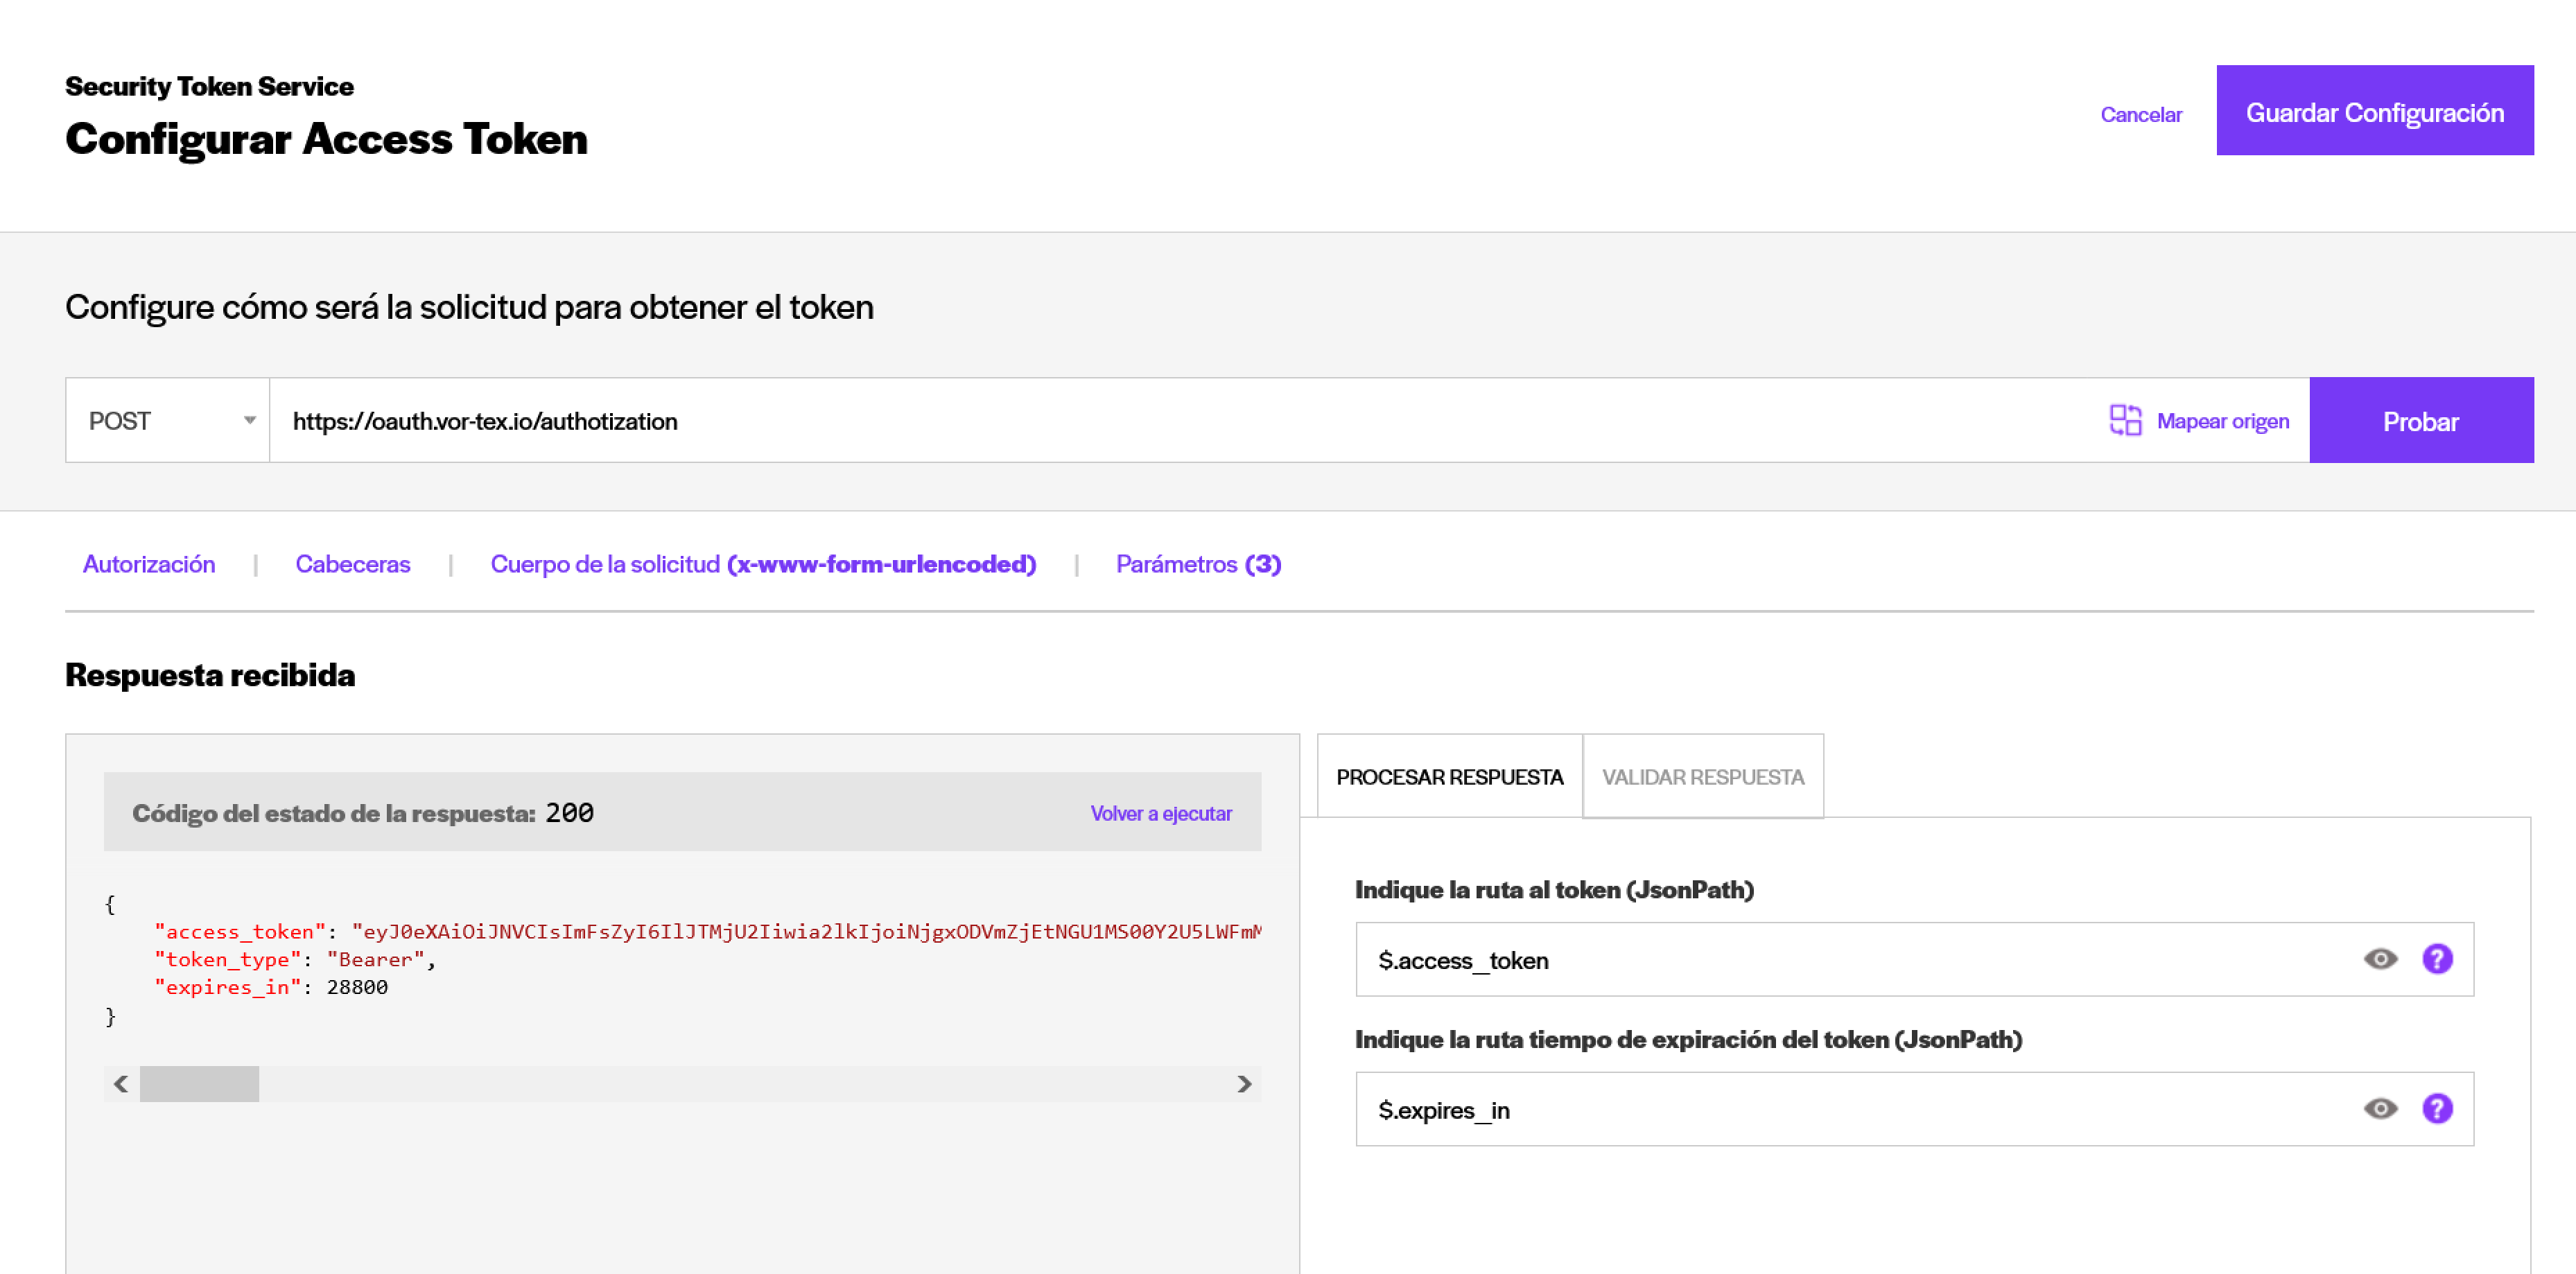
This form of authentication is to make a pre-application request for data for a token. This is the type of authentication of the OAuth20 standard, although the platform is flexible for services that do not conform to that standard.
Once the option is selected, you should click Configure.
This screen would be displayed where you could set up the token request and process your response.
It should indicate compulsory the path token using a JsonPath, and if the route is informed in the response at the time of expiry of the token.
And it could add the parameters that are required in the application.
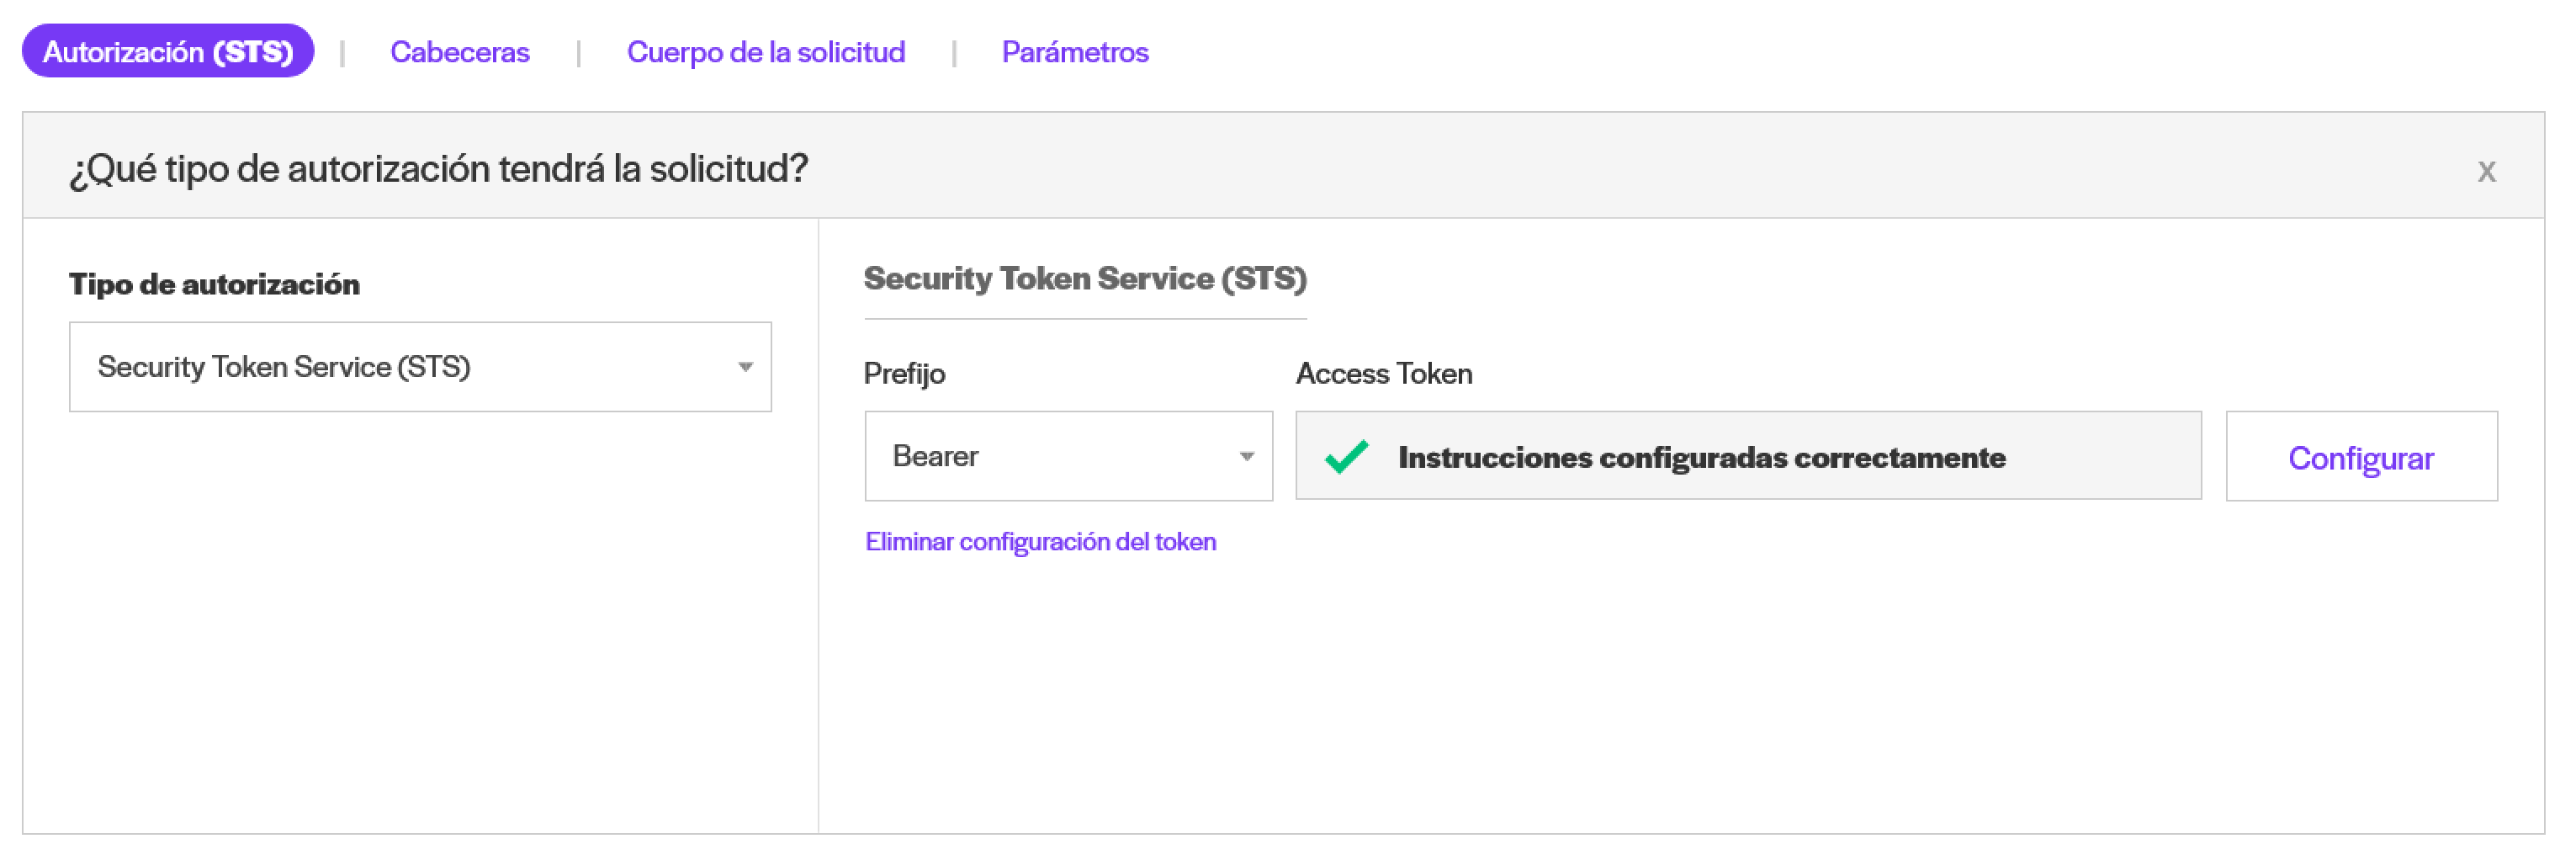
By saving the configuration, you would return to the home application configuration screen.
By default, the token obtained would be sent in the Authorization cap with the Bearer prefix and token value. You can change the value of the prefix if necessary.
Headers
If the service requires the sending of specific headers in the application, it should configure them.
Headers may be non-edited (default), editable or mapping on a segment of their value. If editable or add mapping, you could expose them as parameters or headers of your API method and assign them to context variables.
Request body
The body of the request is part of the content that would be sent in the request and relates to the type of content or Content-Type.
You could select between the different types of content and then add parameters.
application/json
For example, in the following case represented in cURL it is a POST method that requires the shipment of a body-json:
The Available maps and in the application, you should add the name of mapping between double keys in the position that appropriate.
--header'Content-Type: application/json'\--data-raw'{"accountId": 99,"date":"2022-08-01"}'
For configure this web service as a data source, we must select the type of POST request and Content-Type application/json. This would enable the option to enter the body or body of the request.
If requires that the values of the attributes of the request body be editable parameters in the API data view and method, we must use the functionality ofAdd mapping.
Must click on the button Add mapping and enter a Mapping name which would be the name of the parameter and a default value. Then click on Add.

The name of the mapping would be the name of the data view parameters and of APIs methods. The names of parameters can be equal to or different from the attributes of the request json. This allows you to change the names of your parameters more flexibly.
application/x-www-form-urlencoded and multipart/form-data
If you select these content type options, then you should add the parameters in the tab Parameters.
Parameters
Parameters of the request are part of the content to be sent in the request to the service and the type of content or body of the requested request is related.
If you do not select a type of content, the added parameters would be sent in query-string, i.e. in the form api.example.com/method/key
Query parameters can be defined as pairs key-value optional which appear after the question mark on the URL. Basically, are URL extensions used in service execution web.
Query parameters are added at the end of the URL with a "?". The question mark is used to separate the route and query parameters.
It can be represented as follows:https://myserver.com/resource-name?param1=value1¶m2=value2
For example:https://miservidor.com/methodium=1999&mes=12
In that case, should be entered into Name "anio" and value "1999", and do the same for "month". If you select the option "The value would bewill be displayed as an editable value in the data view and your API methods. In that way, being editable, the end user could change those values.

Do not enter editable parameters containing tokens or access keys to the web service.
Reading or writing actions
Independently of the type of request made to the web service, you can define the kind of action you were doing. This allows you to avoid executions of writing unwanted to origin. By default, the Reading option. Only if you were taking action to writing should select that option.
Answer
Once the application settings have been completed and having obtained the answer through the Test button, you could begin work on the processing of the response.
The aim of the following settings to process the response to obtain the required data in a tabular format, then to apply transformations and enrichment in the data view. However, you could always state if you wish the answer as received from the service, without transformation (see method formats).
Route to data (or path to data)
What is the JsonPath?
JsonPath uses a special annotation to represent nodes and their connections to adjacent nodes on a JsonPath route.
JsonPath uses a special annotation to represent nodes and their connections to adjacent nodes on a JsonPath route. The sign "$" represents the strict object.
This would see a technical annotation:
$.result
You can use esta toolto evaluate your JsonPath if you have doubts.
In short, the JsonPath allows you to define which element of the Json response of the web service would be tabulated in the data view.
For example, if your web service response is as follows, your JsonPath would be $.result
{"meta":{"status":"ok","lenght":6},"result":[ [ [ [ [ [ [ [ []{"account":{"base_uri":"https://vor-tex.io","is_active":true,"account_id":33 33 33 33,"account_name":"Vor-Tex"},"surname":"Doe","name":"John","created":"2020-04-10T11:22:54.332"
...
You can preview the respect with the button below:
Now, as can be seen, cells containing JSON objects, since the structure of the response contains nested. You can leave it that way, or you can extract data from objects by evaluating path to data.
Evaluate path to data
You should enter the nodes you want to access. The same should be separated by | (pipe/side bar) and in the case of access the children of a node should be used. (point).
For example, using the answer example above you can select each attribute.
The tabulated preview would thus be:
Identification of subjects/headers
Web services often report the terms, headers or attributes of the data. This configuration would allow you to define the headers of your data view.
In the examples above, the value item is informed as attributes. In that case, you must select "Yes, they are the attributes"
If you are on a different path than the data, the route to the headers should be configured following the JsonPath criterion explained above.


If your web service has no securities titles/headers, don't worry, you could add headers in the data view.
Response validation
It is an optional configuration that allows you to enter additional validation to see whether the response delivered is actually as expected, as it may be informed in any of its attributes that was not the case.
Extended fields
Extended fields are used to extract data outside the data table and headers. For each field you must enter its name, description and route.
Following the example of the previous answer, the path to obtain the value of the "lenght" attribute would be "$.meta.lenght".
Define metadata
Once your web service has been set up, you should click Continue and complete the metadata that would allow you to find then its data source and keep its resources tidy.
The data source is created by default in draft state.
Frequency of updating
In the second step, by completing metadata, you could define the frequency of updating your data.
This is the first level of management of the platform. We suggest selecting the option that corresponds to the frequency of updating of the data at source.
For example, if the data is updated every hour, select the"Every hour". If they are daily update data, for example financial indicators, select the "Daily" option
With the option "Other" you can enter a specific timetable.
If you do not know which option to select, do not select any or select "Under demand".

So far it has configured its data source from the web service. You should now create a data view to continue the process.
Related Articles
What are data sources
Summary Data sources are the starting point for the data flow, from which data views and APIs methods are created. Below you can find data sources characteristics. Some basic concepts When we talk about data sources, we must consider the following: ...Data sources from URLs
Summary The URL connector allows you to collect data from HTTP(s) and FTP protocols. To collect data from a file hosted in a URL, you must go to Data sources > From URLs Configuration Enter a URL with a clear link from where you want to collect. ...Data sources from SOAP/xml web services
Summary The SOAP/XML web services connector offers all the necessary capabilities to connect to these types of sources. This option allows collecting data from SOAP/XML web services or configuring writing actions, for then creating data views and ...What is a data view
Summary The platform does not require an off-line ETL process to extract data from the origins, but associated with the view, find a set of rules that the data engine interprets for check the source on demand or periodically, extract the data updated ...Databases from Databases
Summary The Databases connector offers all the capabilities needed to connect to such sources. This option allows you to collect data from different types of databases or configure writing actions, then create data views and exhibit them in your API. ...